.jpeg)


Looking for a quick and straightforward way to record meetings and other online events? Many professional organizations and institutes use the Webex program by Cisco to host and record meetings, classes, training, and other virtual events.
Webex has built-in recording capabilities that allow hosts to capture and share their meetings with just a couple of clicks. If you wish to record a Webex event as a participant, things can get a little tricky.
Don’t worry though, we’ve got you covered! In this article, we’ll walk you through the process of recording a meeting on any device and provide a couple of Webex video recording alternatives
Can You Record a Webex Event?
Webex offers an excellent option for recording lectures, online meetings, and other video content you wish to share on platforms like YouTube. The options you have for recording Webex events will vary depending on subscriber type. If you’re a free Webex subscriber, you can only record locally to your computer using the desktop app. Those who have a paid subscription to the app can record a meeting and save it to the cloud.
Note that you can only record a Webex event or meeting if you’re the host or alternate host. Webex does not support recording for participants directly within the platform. If a participant is granted presenting permission, they may record the event.
Can You Record a Webex Meeting as a Participant?
All recording from within the Webex platform has to be done by a host or alternate host. You cannot record a Webex meeting as a participant unless you’re a presenter. If you wish to record a meeting as a participant, you’ll have to use a native recorder on your device or a third-party recording app.
Can I Record a Webex Meeting Without Participants?
Webex has different screen layout options so you can record your meeting with or without participants as needed. You’ll want to change your screen layout to “Focus” to record a session where content isn’t shared. If your meeting features shared content, choose “Focused content with active speaker” or “Focused content” for your screen layout.
Use these steps to adjust the setting in Webex and record a virtual meeting without participants:
- Login to Webex with your username and password.
- Choose Preferences from the navigation menu on the left side of the screen.
- Click on the Recording tab.
- Locate the Recording Layout section. Under When the meeting has shared content, click either Focused content or Focused content with active speaker based on your need. Under When the meeting has no shared content, click Focus.
How Do I Record a Webex Meeting?
How you can record a Webex meeting depend on several factors:
Are you a free or a paid Webex user?
Free Webex users have limited recording options. You can only record from the desktop app, and you cannot record to the cloud. Your recordings will only save locally on the hard drive on your computer, which you should consider if you want to share them. Paid users can record from desktop or mobile devices and have the option of saving their recordings to the cloud or their device.
Are you the host, cohost, or presenter?
Webex only supports recording for hosts, co-hosts, or presenters. Recording a meeting as an attendee can later help reference meetings, training, or educational material. However, if you wish to record a meeting as an attendee, you can’t go without an additional program.
What type of device are you using to record your meeting?
Using a desktop device, how you record will vary slightly from recording on mobile devices. The quality of your recording will be impacted by the specifications of your device and the method you choose to record with.
Paid users have the following limitations for recording a meeting and saving it to the cloud:
- If you begin a session on a phone, you can’t record it to the cloud.
- Cohosts cannot record a meeting if the host is present in the meeting.
- Video played from your camera while sharing your camera over a shared presentation won’t be captured in your recording.
We’ll explain how to screen record on any device and provide step-by-step instructions to walk you through the process. After reading our tutorial, you’ll be ready to capture a Webex meeting or event from your desktop, phone, or other mobile devices.
How Do I Record a Webex Meeting on a Laptop or Computer?
You can record a meeting in Webex from your laptop or computer with just a few clicks.
- Open Webex and log in with your username and password.
- Click on the Record button. Follow these simple step-by-step instructions to record a Webex event from your laptop or computer:
- Choose Record on my computer from the popup or Record in the cloud.
- Click the red Record button in the popup window.
*If you need to pause or stop your recording, click the Record button again and select Pause or Stop.
How Do I Record a Webex Meeting With Audio?
If you want to include audio in your meeting recording, set up your audio connection right way. When you begin a recording, choose the Call Using Computer audio option. You’ll receive a warning that your audio won’t record if this option isn’t selected.
How Do I Record a Webex Meeting as a Participant?
No matter the type of device, there’s a workaround to capture your screen and record Webex content if you’re not a host, cohost, or presenter. Keep reading to find out how to record a meeting as a participant on any device.
How to Record Webex Meeting on PC
If you’re using a PC, you may be surprised to learn you can capture your screen using PowerPoint. Though your recording quality won’t be the best, you can record and save content.
Complete the following steps to record Webex on PC systems using PowerPoint:
- Make sure your Webex meeting is displayed on your screen.
- Open the PowerPoint program.
- Choose Blank Presentation from the provided options.
- Click Insert Tab and then select Screen Recording. This will cause your computer screen to gray out.
- Press and hold the Windows Key + Shift + F to record your entire screen.
- Click Record to start a three-second recording countdown. Your recording will begin when the countdown stops.
Place your mouse at the top of your screen at any time during your recording to access the Pause and Stop features.
How Do I Record a Webex Meeting on Windows 10?
Windows 10 includes an Xbox Game Bar program to record a Webex meeting. This app was developed for live streamers to capture their gaming sessions, recording meetings and events.
To record a Webex meeting on Windows 10 using the Xbox Game Bar, follow these steps:
- Before opening the Xbox Game Bar app, select the window, you want to record on your screen.
- Open the Start Menu and then locate and click on Xbox Game Bar from the list of apps.
- Click the Record button to start recording your Webex meeting.
Recordings made in the Xbox Game Bar app save to the Videos folder of your Windows 10 system.
How Do I Record a Webex Meeting in Browser?
To record a Webex meeting from your computer browser on a PC, use either of the methods mentioned in the two sections above. If you’re using PowerPoint, you can record your whole screen, including your browser window, by pressing Windows Key + Shift + F. You can also select to record only your browser window after clicking Screen Recording.
To record a Webex meeting in a browser window on a Mac, follow these steps:
- Open the browser window you would like to record.
- On your keyboard, press and hold Command + Shift + 5.
- Choose to record only the window you have opened on your screen.
A thumbnail will appear on your screen after you click Stop to end your recording, and you’ll be able to select where your screen recording is saved.
How Do I Record a Webex Meeting on a Phone?
If you’re a meeting host or cohost, follow these steps to record your meeting from within the Webex app on your phone:
- Tap the More button, represented by three dots.
- In the General section, locate Record.
- Tap Record to begin capturing your Webex meeting. You can Pause or Stop your recording by tapping the More button again.
If you want to record a Webex meeting from your phone as a participant, you’ll have to use your device’s built-in recorder. Keep reading to learn how to use the built-in recording features on iPhones and Android devices to record a Webex meeting.
How Do I Record a Webex Meeting on Android Phones?
The Android built-in screen recording feature is a convenient way to record a Webex meeting from anywhere as a participant. The Android software version you have on your phone will determine how you record your screen.
Record Webex meetings using Android 11:
- Access the Quick Settings menu and select Screen Recorder.
- Choose your audio and video settings and then tap Done.
- Grant permission for the Android Screen Recorder to access your device.
- Select Start Recording.
You can find your recordings in the Photos App or Gallery on your phone.
Record Webex meetings with older versions of Android:
- Enable Developer Mode by accessing your Settings and selecting About Phone. Tap Builder Number seven times, and you’ll get a notification advising you’re now a developer.
- Return to the Settings menu and select Advanced. From this screen, choose Developer Options and then Feature Flags.
- Turn on settings_screenrecord_long_press.
- Hold down the Screenshot button.
- Choose Start Recording from the popup menu.
- Tap Start Now on the new popup that displays.
Your recordings are saved to the Default Photo Gallery on your phone.
How Do I Record a Webex Meeting on iPhone?
You can record a Webex meeting as a participant from your iPhone using the screen recording feature introduced in the iOS 14 update. Follow the instructions below to record a Webex meeting using an iPhone:
- Choose Control Center from the Settings menu. Tap once on the + icon next to Screen Recording.
- Go back to your Home screen and swipe down from the upper right corner of the screen to open the Control Center.
- Press and hold the Record button.
- Turn your mic on by tapping the Microphone button.
- From the scrolling menu, choose where your recording is saved.
- Tap Start Recording to begin a three-second countdown. Once the countdown finishes, your recording will begin.
Alternatives to Record Video Meetings in HD
Webex is not your only option if you want to record online videos easily in high-definition. There are many alternatives to Webex that offer more features and functionality. We’ve reviewed our three top picks for screen recording software and highlighted the best parts of each to help you choose the best one for your needs.
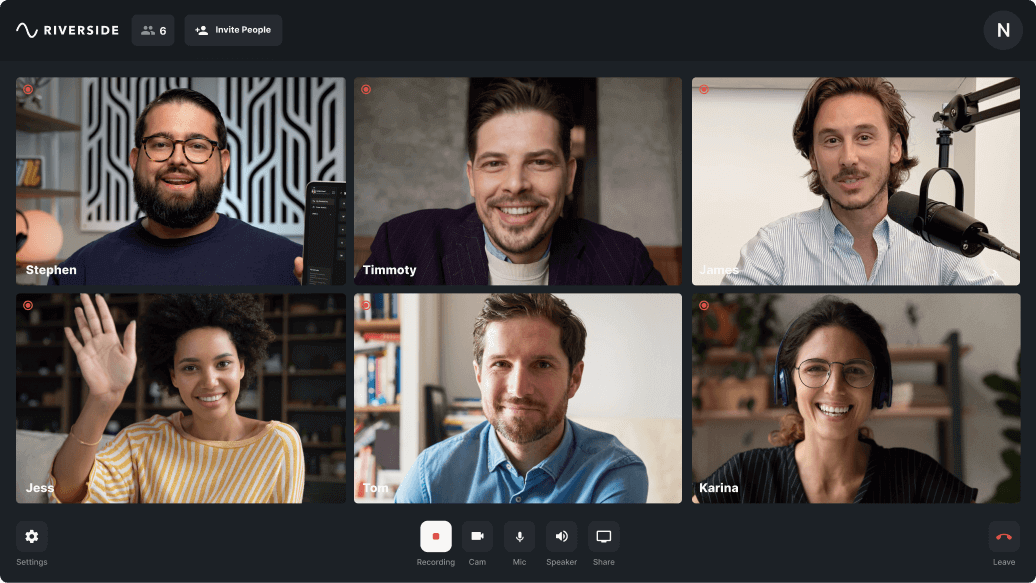
1. Riverside.fm
Riverside is a complete remote recording software program that lets you record HD audio and video with just a couple of clicks. Riverside.fm has a suite of recording and editing features that make this all-in-one platform our number one pick for Webex alternatives. Riverside makes it easy to share your recordings online across all major platforms and can be used for entertainment, professional, and educational purposes.
Our favorite Riverside features:
- Localized recording lets you capture professional-quality audio and video regardless of the strength of your internet connection.
- High-quality resolution with up to 4K video and up to 48kHz audio resolution.
- Separate audio and video tracks for each participant in the recordings
- The text-based Editor tool provides automated and easy-to-use features to enhance your recordings.
- Producer Mode lets you interact with your meeting participants without being captured in your recording.
To learn more about what Riverside offers click here, or sign up today to experience it all yourself.

2. Kaltura
Kaltura uses cloud technology to record and share video easily from anywhere. The system is designed to host meetings, webinars, town halls, and other virtual events. It has video management tools for eThanksEducation institutions and telecom companies like this platform, thanks to its easy sharing capabilities through the cloud, education institutions. It has and telecom companies like this platform.
Our three favorite Kaltura features:
- Kaltura lets you record and host real-time events, live streaming, and Video On Demand.
- The platform’s video management system lets you securely publish video online on major social sites.
- See how your videos perform online with analytics reporting.
3. Blackboard
Education institutions mainly use Blackboard for online learning. Though it isn’t as versatile as the other two programs on our list, Blackboard has a reputation for being a reliable video platform.
Our three favorite Blackboard features:
- Easily share your screen and other files during video sessions.
- The program has a convenient file management system where all of your video recordings are stored.
- You can share your recordings using links sent via email or the Blackboard system.
Webex Recording Made Easy
Webex is a great solution for recording meetings and virtual events from a desktop or mobile device. Though Webex has restrictions on who can record from their platform, these restrictions can easily be circumvented using the built-in recording features on your PC, Mac, iPhone, or Android device. We recommend opting for an all-in-one recording, editing, and sharing platform like Riverside.fm for recording and publishing HD video content online.
Webex Recording FAQs
Do you still have questions about recording a Webex meeting or event using a desktop or mobile device? Browse or Webex Recording FAQ section to answer users’ common questions about recording sessions using Webex and third-party screen capturing programs.
When You Record a Webex Meeting Where Does it Go?
Where your Webex screen recording goes will depend on the type of Webex account you have. Free users can only record locally, so all recordings will be saved directly to your computer’s hard drive if you have this type of Webex account. Paid users can choose to record locally or take advantage of Webex’s cloud recording features. Having your recordings on the cloud makes it easier to distribute them online.
Why Can't I Record My Webex Meeting?
The Webex app has rules about who can and can’t record a meeting within the program. Only a host, alternate host, or presenter may record online meetings in Webex. If you’re not the host or alternate host, you may record the meeting if the host makes you a presenter. If this isn’t possible, you’ll have to use a third-party screen recording program to capture the session.
You also need to check which version of Webex you’re using and which type of device you’re trying to record with. If you’re using the free version of Webex, you can only record using the desktop app.
Can I Record a Webex Meeting on a Phone?
Yes, you can record a Webex meeting on an iPhone or an Android. If you’re the meeting host or cohost, you can record the session directly in the Webex app. However, you’ll have to use your phone’s built-in screen recording features or a third-party screen recorder as a participant.
How Do I Convert a Webex Recording to MP4?
All cloud recordings are saved in MP4 format, but your recording will be saved as an ARF file if you’re recording locally. WebEx currently supports MP4 conversion on Windows computers, and Mac users can only access local recordings in ARF format. Webex has its Webex Recording Converter you’ll need to install to convert files on a Windows device.
Follow these steps to download and install the Webex Recording Converter:
- Make sure your Webex account has host permissions. You’ll only be able to download the converter if your account has host permissions.
- Log in to your Webex site by entering your username and password.
- Go to the navigation bar on the left of the screen and choose Webex Events or Webex Training.
- Click Support and then Downloads.
- Choose Recorder and Players and then Recording and Playback.
- Find the Webex Recording Converter and click on Download.
- Follow the instructions for installing the Webex Recording Converter once downloaded.
Once you’ve downloaded the converter, you can begin creating MP4 files. If you’re a Windows user, follow these steps to convert your Webex recordings to MP4 format:
- Download the recording you wish to convert from your Webex site to your computer.
- Open the Webex Recording Converter.
- From the File menu, select Convert to MP4.
- Select the file you want to convert from ARF to MP4 format.
- Choose where you want to save the file in the Save As section.
- Choose what you’d like to record from the Content options. In addition to video, you can also record chat, Q&A, notes, polling, and file transfers.
- Preview what will be converted in the Preview Layout section.
- Select your Video Quality. Low video quality will create a smaller file using 3 fps. Medium quality is the default conversion option and creates an average-sized file using 5 fps. High quality will produce a large file size using 8 fps.
- Choose whether you want to start your conversion now or schedule it for a later time from the Conversion Start Time section.
- Click OK on any dialog box that opens to start the conversion.
How to Record a Webex Meeting on Chromebook
Your Chromebook comes with a built-in screen recorder you can use to record a Webex meeting. The Chromebook recorder has features that allow you to edit and share your Webex recording.
Follow these step-by-step instructions to record a Webex Meeting using a Chromebook:
- Press and hold the Show Windows + Ctrl + Shift keys.
- Select Screen Record from the menu.
- Choose if you want to record a browser window, a portion of your screen, or your entire screen to begin recording.
Once you’re finished recording, locate your video in the Videos Folder.
How to Record a Webex Meeting on iPad
You can use the screen capture feature introduced in the iOS 14 system update to record a Webex meeting on an iPad:
- Choose Control Center from the Settings menu. Tap once on the + icon next to Screen Recording.
- Go back to your Home screen and swipe down from the upper right corner of the screen to open the Control Center.
- Press and hold the Record button.
- Turn your mic on by tapping the Microphone button.
- From the scrolling menu, choose where your recording will be saved.
- Tap Start Recording to begin a three-second countdown. Once the countdown finishes, your recording will begin.
You can stop your recording at any time by tapping the red status bar at the top of the screen and then tapping Stop.
How to Record a Webex Meeting on Tablet
Most Android tablets have a built-in screen recorder that makes recording Webex meetings and events a breeze. One of the most popular Android tablets is the Galaxy Tab, which has a more advanced screen recorder that does well-capturing HD content.
You can record a Webex Meeting on a tablet by doing the following:
- Swipe down from the top of your screen to access the Notification Panel.
- Locate Quick Toggle Options and hold down the Screen Recorder toggle.
- When prompted, select the recording quality in the Screen Recording Settings popup.
- Select if you want to use Media sound, an external mic, or choose not to include audio with your recording.
- Access the Notification Bar and tap on the Screen Recorder toggle.
- Select the sound source for your recording and then tap Start Recording.


-(1).png)
.png)