.webp)


Remote filming is becoming more and more popular, but it’s hard to find a good step-by-step guide on the internet on how to do it correctly.
Don’t worry, we’ve got you covered! In this article, we’ll go into detail on what exactly remote filming is and how to remote film successfully in just 8 steps.
Let’s get into it.
What is remote filming?
Remote filming is a method of recording video content without physically being present at the location.
This type of filming is usually cheaper than traditional filming. It can be done using mobile phones, video-capturing software (like Riverside), and other recording equipment like microphones, a camera, tripods, lighting, etc. You can even use a high-end camera like a DSLR if you want to.
You can check out the following case studies to see how other companies have adapted to remote filming:
- Marvel (Entertainment): The company behind your favorite superhero films, hosts various podcasts which they film remotely. They use home recorders, mics, and Riverside to master their podcasts ‘This Week in Marvel’, ‘Pull List’, and ‘Women of Marvel’.
- Intuit: The company responsible for Quickbooks and TurboTax, switched to remote recording during the pandemic. They film customer interviews, events, and their internal company content all using remote recording software, Riverside.
What type of videos are ideal to be filmed remotely?
The best videos for remote filming are those whose production can be carried out with minimal equipment and crew. You don’t even need a fancy camera; even the back of your smartphone should get the job done.
The best candidates for remote filming include:
- Demos or tutorials: Employees can create effective demos or tutorials from their own spaces, using the equipment they have on hand, such as smartphones or webcams. The use of remote recorders with screen recording (like Riverside) can also be particularly effective for creating software tutorials, training sessions, e-learning courses, or providing visual instructions alongside customer support.
- Remote interviews: Interviews can be conducted and recorded remotely using video conferencing software.
- Testimonials: Remote-filmed testimonials allow customers or clients to share their experiences in their own environment, which can often lead to more personal and genuine reflections.
- Leadership or Company Messages: Company executives or team leaders can record messages for their employees or customers using smartphones or webcams. These videos can be used for internal communication or shared on social media platforms.
- Mixed media videos: These videos combine high-level and dynamic graphics elements with live-shot or stock footage.
Benefits of using remote filming
Here are the main benefits of remote filming:
It’s cheaper than traditional filming
Remote filming can significantly reduce production costs by eliminating the need for expensive equipment rentals, equipment transportation, and traveling for on-site crew members.
It helps you work with global talent
Why stick with local talent if you can work with the best international talent? Remote video production allows businesses to work with professionals from different countries.
It gives professional quality results
Remote filming done right can yield professional-quality results. With good planning, the right equipment, and proper execution, you can make a really high-production quality video.
It can boost productivity and efficiency
With traditional filming, you would send a filming crew to a location to shoot a video project. You would then wait for them to return before moving on to the next project.
Unfortunately, this can constrain the number of projects you can work on, as you’re limited to handling only one project at a time.
But remote filming lets you handle multiple productions in a day. Tools like Riverside let you take shots from 8 different participants simultaneously, with 8 separate (4K) recordings for each.
It can be used in special circumstances
Remote video production can be particularly useful when on-location filming is not feasible or safe (such as during a global pandemic).
How does remote filming work?
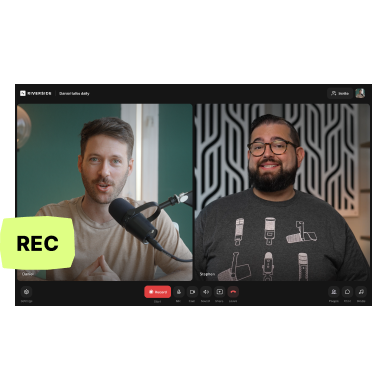
There are two types of remote filming techniques. One uses sophisticated tech, like ‘Crew in a Box,’ and the other uses more affordable and readily available tech, like a smartphone and recording software like Riverside or Zoom.
Let’s look at how the former tech works. Crew in a Box is a plug-and-play remote video production solution that allows on-camera talent to set up a professional-quality recording environment at home easily. The system includes a high-end 6K camera, LED lights, microphones, and an online teleprompter; all controlled remotely by a production team over bonded cellular networks.
While this method is one of the best ways to film remotely, it’s insanely pricey – the rental fees average around $5000/day.
But remote filming doesn't have to even cost a fraction of that. Your smartphone and a good remote recording software are all you need to get started. Riverside is a great option as it’s highly affordable and easy to use. Not only can you record, but also edit, live stream, screen record, and more.
The next section will give you an idea of how remote filming works and also explain how to remote film successfully.
How to film remotely: 8 Steps to a successful shoot
Step 1: Pre-production planning
Before starting the shoot, plan your project thoroughly. Here are some things to do:
Assemble your filming team
At this step, there are two main questions to ask yourself:
- What are the specific roles and responsibilities required for this project? Identify the key positions for your remote filming team, such as director, producer, camera operator, sound technician, and editor.
- Do you want to hire a team locally (and then send them to the remote location)? Or do you want to hire talent at the location itself?
If your shoot involves non-professional actors (like employees of your company or clients who want to give a testimonial), ensure they’re comfortable in front of the camera and understand what you require of them.
Plan your budget and choose your equipment
Budgets for remote films can vary widely depending on production value, video complexity, and video quality desired.
Either way, you need to follow at the bare minimum:
- A camera (smartphone, DSLR, or mirrorless)
- Lighting – for clear and professional-looking videos
- Microphones (lavalier, condenser, or shotgun)
- Headphones
- Tripods and stabilizers – to get steady footage and prevent shaking or unstable shots.
- High-quality remote video software like Riverside
- Editing software (Riverside text-based editor offers you an array of AI tools to turn your recordings into content seamlessly.)
- Memory cards and card readers – for uploading footage once the shoot is done
Scout your location
Select a location ideal for your video. When scouting for one, consider the lighting and noise levels. Also, enquire if you need permission to film there.
Consider filming in multiple locations to increase the production value and make your film look more interesting and varied.
Create a storyboard, shot list, and script
If your film is more complex than a simple interview or testimonial video, you might want to prepare a storyboard or a shot list.
To highlight why creating a storyboard and a shot list is a good idea, let’s look at this real-life example of Depart, a movie created by three women – Mathilde Suisse, Lauren Sowa, and Jennifer Liu.
- To film the movie, the team first created a blueprint of Lauren’s house, which was supposed to act as a virtual map. This helped the actor know where to place the camera and lights in her home.
- Then Matilde, the director, drew the storyboard and a shot list, breaking down each shot in a scene and explaining shot type, action, location, etc. Doing this helped Lauren understand how each shot would look and what lens would be needed for the shot.
- Only after all this meticulous pre-production did they start filming.
We hope this convinces you of why pre-production, including scripting and storyboarding is necessary, and we highly recommend doing it before working on your own video.
Step 2: Remote Direction and Collaboration
Since the filming is remote, you’ll need to coordinate with people on the other side. So you’ll need a conferencing tool like Zoom, Skype, or Riverside.
We’ll cover tools in details later on, but note that you’ll want something like Riverside that has local recording. Local recording means everythgin records directly to your computer, instead of relying on internet connection. This prevents the recordings from being corrupted by fluctuations in internet connection.
Additionally, consider using project management tools like Trello or Asana to keep everyone on the same page.
Step 3: Rehearse and prepare
Make sure the actors stick to the script and storyboard. It’s also a good idea to have a rehearsal before the actual shoot. Also instruct the actors on how to use the remote recording platform so they can self-record without hiccups during film day.
Step 4: Set up the shooting environment
On the day of the shoot, test all your equipment to ensure it's working properly. Arrange the set, props, and wardrobe as needed. Make sure the following is in place:
- A good lighting source, either natural or LED
- A quiet environment that won’t be disturbed during filming
- A tidy background that’s also relevant. Choose a background that tells the audience something about the subject or their interest. For example, a bookcase works well for a professor or a scientist.
- If you’re filming for a company, choose subtle branding elements in the background to reinforce your company’s identity. Check out this video by the company Wordtune for inspiration.
It’s also a good idea to familiarize yourself with different camera angles to create a visually appealing and engaging video.
For interviews and testimonials, place your interview subject far away enough from the background wall to create space and depth in the image.
Step 5: Prep the person who’s going to be in front of the camera
Get the on-screen talent camera ready. Here’s a checklist of things to watch out for:
- Make sure the person’s makeup is on point
- Ensure the person’s hairstyle is neat; tame any flyaways
- Actors should stay hydrated, get enough sleep, and avoid alcohol and excessive sugar. All this will help them look and feel their best on camera.
- Avoid clothes that are all-white or all-black, as the camera can make them appear harsh.
Step 5: The shoot
Follow the Storyboard and Script
This is where all your planning pays off. Direct the shoot according to your storyboard and script, and provide feedback and directions to the talent via your chosen conferencing software.
Monitor the shoot
Review footage in real-time, if possible. This can help you make adjustments as you go and ensure that the final video matches your vision.
Step 6: Backup and organize footage
After the shooting is done, back up your footage to multiple storage devices or cloud services. It’s a good idea to organize the files by scene, take, or date for easy access during post-production.
Step 7: Post-production
Edit your footage using professional software like Adobe Premiere Pro or Final Cut Pro. Editing may include trimming the video, sequencing clips in order, color correction, audio mixing, and more.
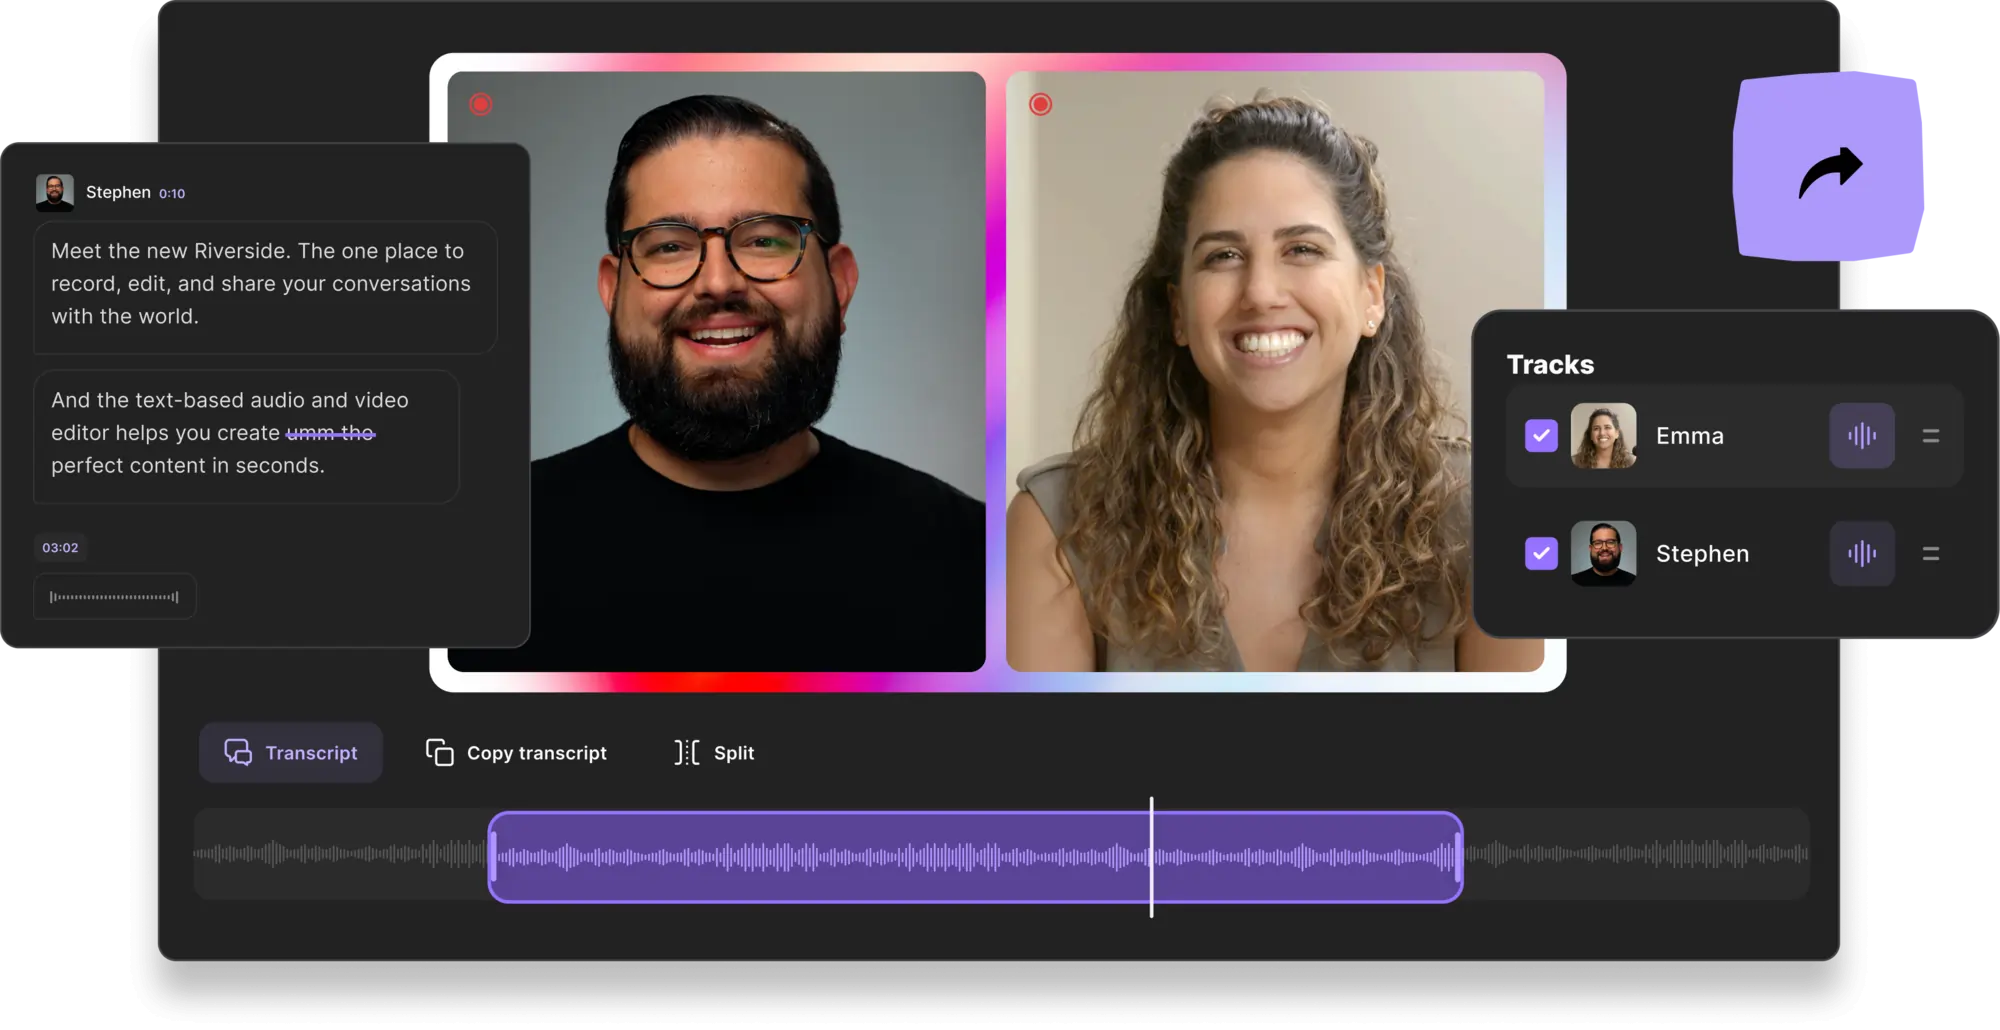
For an easier way to cut on editing, use an automated Editor like Riverside. With text-based editing, you’ll be able to trim your recording as easily as deleting transcript text.
Step 8: Review and revise
Once the final product is complete, share the edited video with your team and gather feedback. Make the necessary revisions until everyone is satisfied with the end result.
Tools to improve your remote filming process
Your choice of remote video production software greatly impacts how easy it is to film and how good the quality of the video is.
Zoom is a popular choice for filming, but it has three major problems.
- Firstly, it only records up to 1080p. So by default, your Zoom's video quality isn’t going to be the best.
- Secondly, Zoom doesn’t record locally on your computer; the recording is done in the cloud, making it vulnerable to fluctuations in your internet.
- And lastly, Zoom can only record separate audio files, not video files. So if you’re shooting an interview-style video with multiple people on the call, you can’t get separate video recordings of each person. You’re stuck with only the group video, which will make post-production hell.
Riverside on the other hand records in 4K quality, so you know your camera is getting the best picture possible. Our platform also sidesteps the problem of a potential dodgy internet connection. It uses local recording, meaning everything is captured directly on your device. This way, even if your internet connection decides to act funny, the quality of the video says the same.
Riverside records up to 8 participants simultaneously (1 host and 7 guests). For each of the 8 participants, you get separate video and audio tracks, making it super easy to edit in post-production.
Another feature that’s useful to people on both sides of the operation is Producer Mode. This allows a person, like the director, to get full control of guest settings without accidently getting recorded. And by the director taking control, the actor doesn’t have to worry about changing any settings during the shoot, letting them completely focus on delivering their best performance.
Once the shoot is done, Riverside’s text-based editor lets you edit the video quickly and easily and have it ready in no time. The Editor uses AI transcriptions so trimming your video is as easy as deleting text in your recording transcript. In the Editor you can also add captions, style your layout and fine-tune your audio with the tap of a few quick buttons.
All this comes at an affordable price; Riverside even has a free option, though it has certain limitations. Even the paid plans start at $15 per month, making it great for creators on a budget. For more details on what features you get with each of our plans, check out our pricing page.
Key Features:
- Crisp and clear recordings with up to 4K video and 48kHz audio resolution.
- Local recording that records video directly onto your device and instead of relying on your web connection. This way, you’re guaranteed clear and consistent video without your video quality going bad because of bad internet.
- Producer mode, which lets you control Riverside remotely. This feature allows a user to manage the technical aspects of a remote recording session without actually getting recorded.
- Record up to 8 participants simultaneously. You can use this to film with participants from multiple locations at the same time, which is ideal for videos, like interviews or testimonials.
- Multitrack recording, which gives you separate audio and video tracks for each person you’re filming, making post-production and editing a breeze.
- Mobile app for Android and iOS to record on the go. You can even turn your phone into your second camera so you can film from two angles.
- A text-based video editor that allows you to edit the video by making changes to the transcript of the content. This leads to speedy editing that accelerates post-production
- Magic Clips feature that uses AI to repurpose your long-form recordings’ key moments into shareable bite-sized content.
- Download highly accurate AI transcription, available in over 100 languages. This makes your content even more accessible, SEO friendly, and repurposable.
- Media Board for live mixing during your session. You can upload and include audio and video in your recording.

Best practices for top-quality remote filming
- Spend a lot of time in pre-production: Don’t skimp out on pre-production; remote recording needs a lot of planning to get things right.
- Multi-camera setup: Use a multi-camera setup, if possible, to capture different angles and perspectives. The more angles you shoot from, the more dynamic and engaging you can make your video. (Riverside is great for this as it allows you to use your mobile device as a second camera.)
- Backup: Always have backup equipment ready, including extra batteries, memory cards, microphones, and light bulbs. You never know when a piece of equipment will fail and cost you your shoot.
- Tech support: If your remote talent is not technically inclined, consider getting help from a local tech support person who can help them with equipment setup and troubleshooting
- Framing and composition: Get your framing and composition right. Use the rule of thirds, keep the talent at arm’s length away from the camera, and avoid leaving too much space above your head.
- Experiment with different camera angles and perspectives: Eye-level shots are common, but low-angle shots can make the subject seem larger and more powerful, while high-angle shots can make them seem smaller and weaker.
FAQs on remote filming
What are the advantages of a remote shoot?
There are a couple of advantages to remote filming, the major ones being that it frees you from spending extra money on travel, studio rental, and equipment transportation. And you can create amazing videos by just using budget tools, like a smartphone camera and recording software like Riverside.
Other benefits include the ability to hire talent or film people from across the globe and the ability to work on multiple projects simultaneously. (You can film multiple people at the same time using Riverside)


.webp)
.webp)
.png)