


.webp)


The key to successful podcasting is all in the details. Your audio quality, equipment, and recording software will all play a role in taking your podcast to the next level. By optimizing your podcast in a variety of small ways, you can produce episodes that engage your listeners and leave them wanting more.
But where do you begin? As a beginner podcaster, you’ll need some clear and simple guidance to help you along the way. We can provide just that with our list of the 20 best podcast recording tips. You only need to read on to discover all the little things you can do to make your podcast the best it can be.
What makes a successful podcast recording?
A successful podcast recording is one that grips its listener with great content and an engaging hosting style. The best podcast recordings also have high-resolution audio, which makes them enjoyable to listen to. This is partly achieved through the standard of recording equipment they use.
In addition to sound quality, successful podcasts have a strong sense of theme, producing unique and attention-grabbing episodes. Many of them are consistent, publishing new episodes once a week to maintain their audience.
How do I make my voice sound better when recording a podcast?
There are several things you can do to improve the sound of your voice in a podcast recording. The first is to invest in a quality microphone to improve your audio resolution. Secondly, pay attention to the way you speak. Enunciating words and talking with confidence will help your listeners follow what you’re saying.
You don't want to sound too robotic in recordings, so inject some emotion into your speech. If you mess up a word or line, don’t panic. Say it again a little slower, and make sure to have a clear take for when you come to edit.
20 Podcast Recording Tips to Try
When you’re just starting out with recording podcasts it can be confusing to know exactly what to do. That’s why we’ve created this list of 20 podcast recording tips. The very best podcasts out there will already be following a lot of the advice we’ve outlined below.
However, even by choosing just a handful of these tips to try, you will see a change in the quality of your final product. So, what are you waiting for? Jump in and give our suggestions a go.
1: Use a high-quality microphone
Your recording equipment will determine the sound quality of your podcast. Having a great microphone makes the difference between crisp and muffled audio. Not sure which microphone is best for you? Check out our guide on how to choose a podcast microphone.
2: Wear headphones
A common cause of echoing in podcast audio is not wearing headphones. Investing in a quality pair of soundproof headphones will enhance your recordings. Our list of the best headphones for podcasting can help you find the perfect pair.
3: Position your microphone correctly
Your microphone should be positioned so it’s close enough to your mouth not to pick up too many background noises. However, it should not be so close to you that it catches your mouth sounds. The ideal distance is about 6 inches away from your face, with some flexibility depending on your personal preference.
4: Record uncompressed files
One of the best ways to make your podcast sound great is to record uncompressed audio. This creates an almost exact copy of the original audio you recorded. All the data of your recording is preserved in an uncompressed file. These types of files are usually easier to edit, and produce better results in post-production.
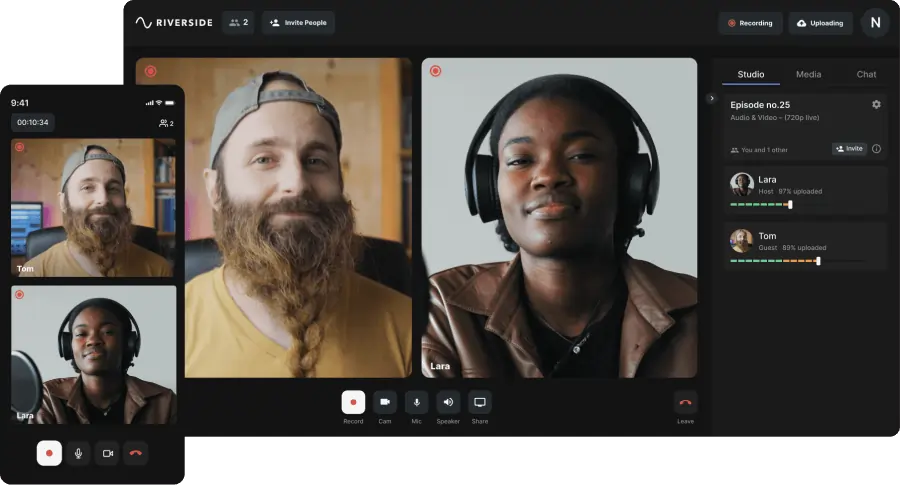
Recording compressed MP3 files can cause you to lose data, and even lower the audio quality of your final product. Using recording software such as Riverside can help you achieve high quality audio. With Riverside you can download uncompressed WAV recordings, to achieve crystal-clear sound.
5: Test your equipment before you record
This tip is vital as a podcast recording can easily be ruined by small mistakes, such as having your mic adjusted incorrectly. Make a checklist for your equipment that you can tick off as you test each piece before recording. This should include your microphone, headphones, and recording software.
Test your equipment with our Webcam Test & Mic Test
6: Soundproof your recording room
Soundproofing is a way of reducing how much noise travels through your room. By soundproofing your space, you can achieve better sounding audio. There are special soundproofing materials you can use such as foam panels that stick to the walls. If you don’t have the budget for these, you can block some sound by hanging heavy curtains on your walls and laying down a thick carpet.
You can learn more about soundproofing in our guide on creating a home podcasting studio.
7: Reduce background noise
Background noise, such as people whispering, electronic devices whirring, or a television playing can be very distracting for podcast listeners. For an ideal recording environment, pick a quiet location where you can be alone. Go around the room and switch off any fans or heaters. Sit away from any windows to reduce the sounds of mowers and dogs barking in your recording.
You can also build a soundproofed home studio with a few materials. Read our blog on creating a podcast studio setup to find out how.
Start recording with Riverside for automatic background noise removal. Our Noise Reduction filters background noise so you don’t need to worry about a remote guest’s loud fan or air conditioning ruining your recording. Start recording
8: Invite other people to your recording
Including guests in your recording is a great way to stimulate conversation and show a different perspective. You could invite a friend or an expert, for interviews or casual discussions. Your guests could join you in a studio for the recording, or attend virtually using remote recording software like Riverside.
9: Mute anyone who isn’t speaking
If you include more than one guest in your recording, you might run into the issue of multiple people speaking over each other. This can make the audio messy and unclear. To prevent any problems, you can mute participants who aren’t speaking. Another solution to this issue is to record using separate tracks.
10: Record each person on a separate track
When more than one person is involved in a recording, make sure that each person’s audio is recorded on a separate track. By doing this, you’ll capture each guests’ audio (and video) on different recording files.
This will help a lot when it comes to post-production, as you can fix issues in individual tracks. You will need to check that the recording software you use supports multitrack recording.
11: Use the best recording software
Using podcast recording software can streamline your process and leave you with a more professional final product. By using this kind of software, you can shoot and edit your podcast in the same place. There are many recording platforms out there, and to choose the right one you need to consider your preferences.
For example, Riverside is a great fit for beginner podcasters due to our easy-to-use interface, separate track recording capabilities, and effective Editor tool.

12: Prepare a script
Having a podcast script to hand while you record is a great way to stay on topic and make sure you don’t go on tangents that might lose your audience. Some people like to fully script their episodes, writing out every word. However, you might prefer to just have a list of topics or questions. This will allow you to riff and ad-lib in a more laid-back way, while still sticking to some key points.
Read more: Podcast Script: How to Write One [With Free Templates & Examples]
13: Practice speaking
One of the hardest things for a beginner podcaster to master is a great hosting voice. This means talking at a pace slow enough to be clear, but not so slow that it’s boring. You will need to speak clearly, with a confident tone that also shows your personality and emotions. Balancing these elements can be tricky at first, so the best thing you can do to improve is keep practicing. Frequently record and listen back to short clips to check the way your voice sounds.
14: Make a test recording
Although you may already have tested your equipment, before launching into a podcast you should make a test recording. This is the best way to ensure that you won’t have any problems with your final product. The test recording only needs to be a minute long but should include you speaking into the microphone. Play it back and listen for any issues with your setup, like unexpected background noise.
15: Leave editing cues in your recording
When the time comes to edit your recording, it can be hard to find those places in your footage where you made mistakes. A time-saving tip is to make a sudden noise during your recording any time you make a mistake. During the editing process, all you need to do is find those spikes in the audio to locate any problems.
16: Add sound effects
Inserting sound effects during postproduction or with a live media board injects personality and fun into your podcast. This can be a great way to keep your audience’s attention. However, it’s important to be sparing with sound effects, as too many can be uncomfortable to listen to and take away from what you’re discussing.
17: Add backgrounds to your speakers
If you plan on uploading a video recording of your podcast, consider adding a background behind each speaker. This is a great way to make your podcast visually interesting and professional looking. Some recording software has green screen capabilities, while others offer the option to add background graphics. You can play with these tools to create backgrounds you’re happy with.
18: Take the time to edit properly
Postproduction is that all-important stage of content creation where you can add the finishing touches to your podcast. Equally important, you can remove anything that shouldn’t be in your recording. For example, sneezes and awkward silences can be cut to make your podcast sound polished and professional. It’s best not to skimp on editing and spend enough time polishing your podcast.
Read more: Podcast Editing: How to Do It In 10 Steps (Complete Tutorial)
19: Repurpose your podcast
Many people neglect this tip, but it can be a great way to widen your audience. Repurposing your podcast involves clipping sections of your recording and sharing them across different platforms. For example, you could make a 10 second clip to post on Instagram to share your podcast to more people.
Repurposing content is simple with Riverside’s dedicated podcast clip maker. It takes one quick and AI does the rest, identifying key moments in your long-form recording and turning them into multiple short clips.
20: Promote your podcast
The first step to getting your podcast noticed is to publish it on a podcast directory. Spotify and Apple Podcasts are both renowned for being extremely popular podcasting platforms. They can give you the opportunity to be discovered by a vast number of listeners.
Promoting your podcast doesn’t have to stop there. You can get creative with marketing your content on social media, using clips, reels and posts to generate interest. You could run a giveaway contest to create excitement about your brand. Joining another podcast as a guest can be another way to advertise your podcast.
The easiest way to record a podcast: Riverside
Riverside is a recording platform designed to make podcast creation easy. You can record and edit from your Riverside studio, and even get started for free. As a beginner podcaster, our user-friendly interface will take the hassle out of podcast recording. Riverside also offers a number of handy features, so you can do the following:
- Record high-quality recordings with up to 4K video and 48kHz audio resolution.
- Download uncompressed (WAV) recordings for a smooth-sounding podcast.
- Capture recordings directly on your device so no internet issues affect your resolution.
- Invite up to 8 remote guests to record with you no matter where they are.
- Record separate audio and video tracks, giving you better control in post production.
- Polish your podcast with custom branding, or add video captions using our Editor.
- Text-based editing so creating quick precise cuts is as easy as editing a text transcript
- Repurpose your content into short shareable clips in one click with our Magic Clips tool
- Join a podcast recording on-the-go with our Mobile App for iOS and Android.
- Mix audio live and spice up your podcast with sound effects with our built-in online soundboard mixer.
- Get a producer to assist without being recorded, using our Producer Mode.
- Share your screen with others, so you can follow a script together or show each other media.
- Host a live podcast and invite audience members to call in live.
FAQs on Podcast Recording Tips
How long does it take to record a 30-minute podcast?
How long it takes you to record a podcast will be individual to you. For example, you might need to repeat several sections to get a clear take, or you might spend longer setting up your equipment than somebody else would.
Because of this, how long it would take you to record a 30-minute podcast can’t be guaranteed. However, on average most people spend approximately 3 hours creating a 30-minute podcast recording, from beginning to end.
What tone should I use in a podcast?
The right tone for your podcast depends on two things: your subject matter, and your personality. The best podcast hosts aren’t afraid to show some of their humor or emotions. However, you should make sure that your tone complements what you’re talking about.
For example, discussing the news or political events will usually require a more serious tone. However, a podcast about fitness or self-help often works better with a friendly tone that can motivate your listener. Ultimately, you should use a tone that makes you feel comfortable and confident, as these traits will engage your listener.
How do I make my podcast recordings sound more natural?
It’s important for your voice to sound natural in recordings so that your audience can connect with you. It’s best to imagine that you are talking to a friend when you record your podcast, so that you speak clearly but without a flat tone.
As with many skills, practice makes perfect. The more you put yourself in front of a microphone and record, the better progress you will make. Listening back to your recordings will also give you a sense of what your voice sounds like, and how you can improve it.
What audio level should podcasts be?
Audio is measured in LUFS, meaning ‘loudness units relative to full scale.’ Podcast hosting platforms normalize how loud their content is. For example, Apple Music normalizes content to -16 LUFS. So, keeping the audio level of your podcast below -16 LUFS will ensure it transfers well to the main podcasting apps and sites.
Why does my podcast sound echoey?
The main cause of echoing in podcast recordings is not using headphones. This applies to any participant in your recording. The echoing happens because audio leaks from your speakers and is recorded by your microphone. The best way to prevent echoey podcasts is to wear headphones, preferably noise-canceling ones.
As well as using headphones, a great way to prevent echoing is with Riverside’s echo cancellation feature. This useful tool can be toggled on or off for each participant in your studio, and reduces the echoes in your recording.
How do I fix a bad podcast audio recording?
There are a few fixes you can try for a bad audio recording, depending on its quality. If you have a recording where sections of speech have been cut off or corrupted, you can dub them over by re-recording those parts. If you have recorded your podcast remotely with multiple participants, you may be able to use one person’s audio track in place of someone else’s bad audio.
If your audio recording has been seriously affected by a problem like using the wrong microphone, then the only way to truly improve the quality would be to record it again. This can feel very disappointing. However, there’s a good chance that your second recording will feel easier than the first, as you have already practiced what to say.


.png)
.png)


